 - top")
 - bottom")

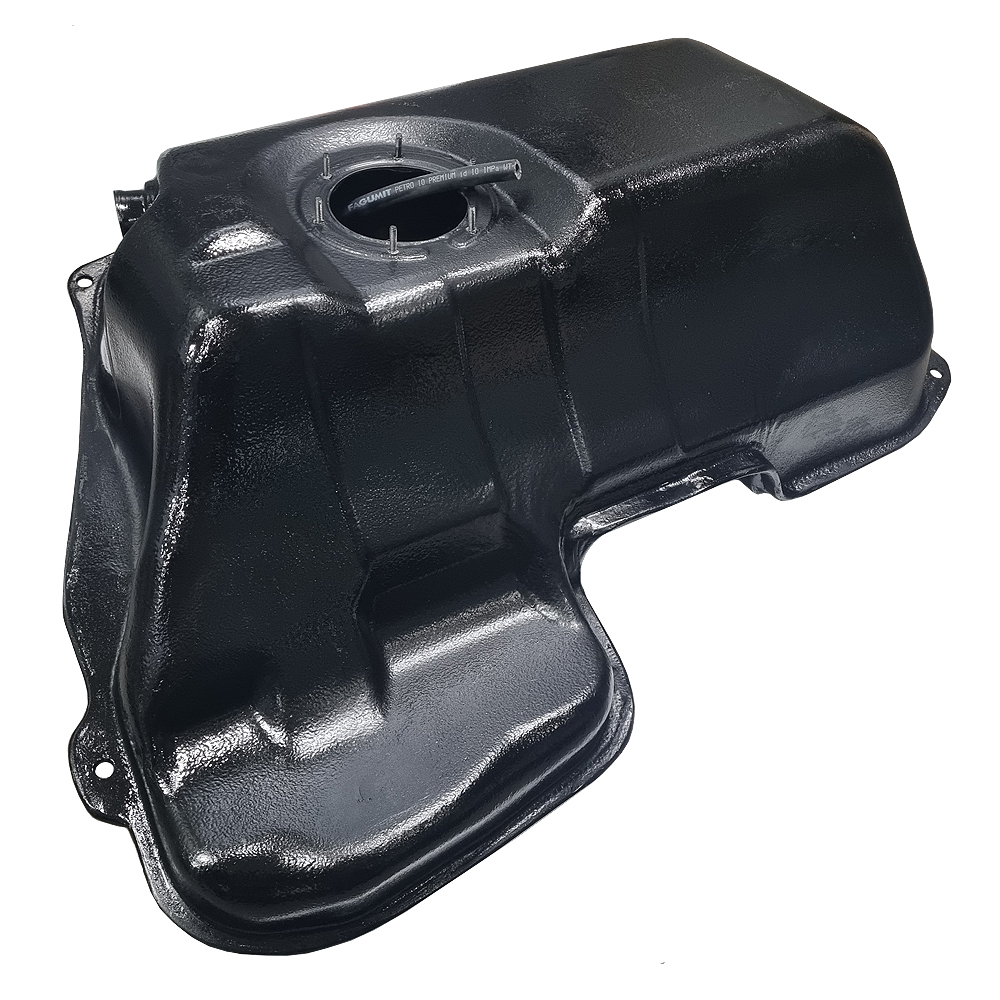
Buy online Plastic fuel tank – Audi 4X4 – 100/200 C3 quattro S6 S4 C4 200 V8 – Petrol/Diesel (1982-1998) replacement for rusty metal tank
Plastic fuel tanks are manufactured in-house – from a modern composite material based on polyester resins, fiberglass and carbon fabrics. They are highly reliable and nearly as resistant to impact as steel.

! Each tank is pressure-tested after production to ensure there are no fuel or vapour leaks.
Upgrade your classic Audi 100 4×4 Quattro with our high-quality plastic fuel tank — a durable, corrosion-resistant replacement for aging or unavailable original metal tanks.
Why Choose This Plastic Fuel Tank
- Corrosion-resistant and leak-proof — unlike steel, the plastic tank will not rust or corrode over time.
- Lightweight and easier to install — reduces overall vehicle weight and simplifies installation, even on older Quattro models.
- Fully compatible — designed to match the original fitment points for Audi 100 4×4 Quattro (C3, S6, S4, C4 V8), so no modifications needed.
- Long service life — stable under normal use and resistant to various fuels, additives, and condensation.
- Improved reliability — eliminates common problems of rusted metal tanks: leaks, fuel contamination, and structural failure.
Compatibility & Fitment
This fuel tank is explicitly engineered for the following models:
- Audi 100 / 200 4×4 Quattro — C3 generation
- Audi S6 / S4 (C4 platform) with V8 engines
Manufactured to match mounting points, fuel sender placement, filler neck position, and fuel line connections of the original tank. Ideal for restorations or conversions when original metal tanks are no longer available.
Tank Specifications & Features
- Material: Composite material based on polyester resins, fiberglass, and carbon fabric, resistant to gasoline and diesel fuel and designed for long-term durability.
- Corrosion- and condensation-resistant construction
- Weight: significantly less than original steel tank (improves fuel efficiency and handling)
- Design: direct swap — no welding or cutting required
- Lifetime: built for many years of service under normal conditions
Installation & Maintenance Tips
- Use new fuel hoses and clamps when installing to ensure leak-proof connections.
- Rinse the tank interior before first fill to remove any transport dust or debris.
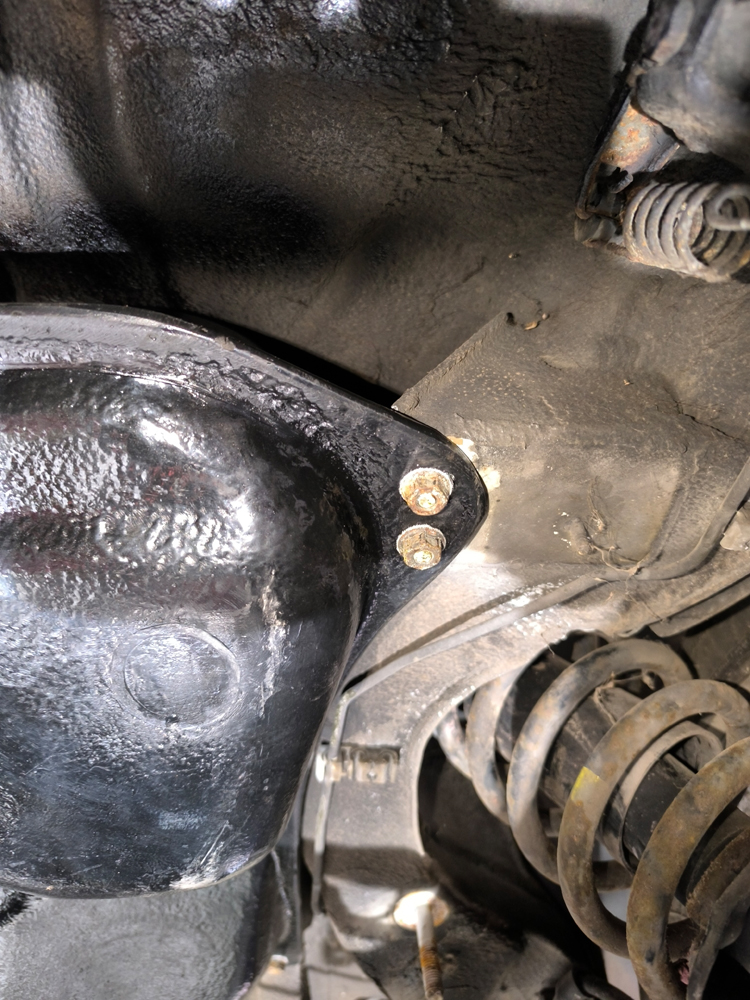
- Check seal and filler neck alignment carefully — the tank is designed for bolt-in replacement with original mounts.
- For sealing, it is recommended to use a fuel-resistant sealant.
When to Consider Replacement
If your original metal tank shows signs of corrosion, leaks, dents, or is incompatible with modern fuels — replacing it with this plastic tank is a safe and long-lasting solution.
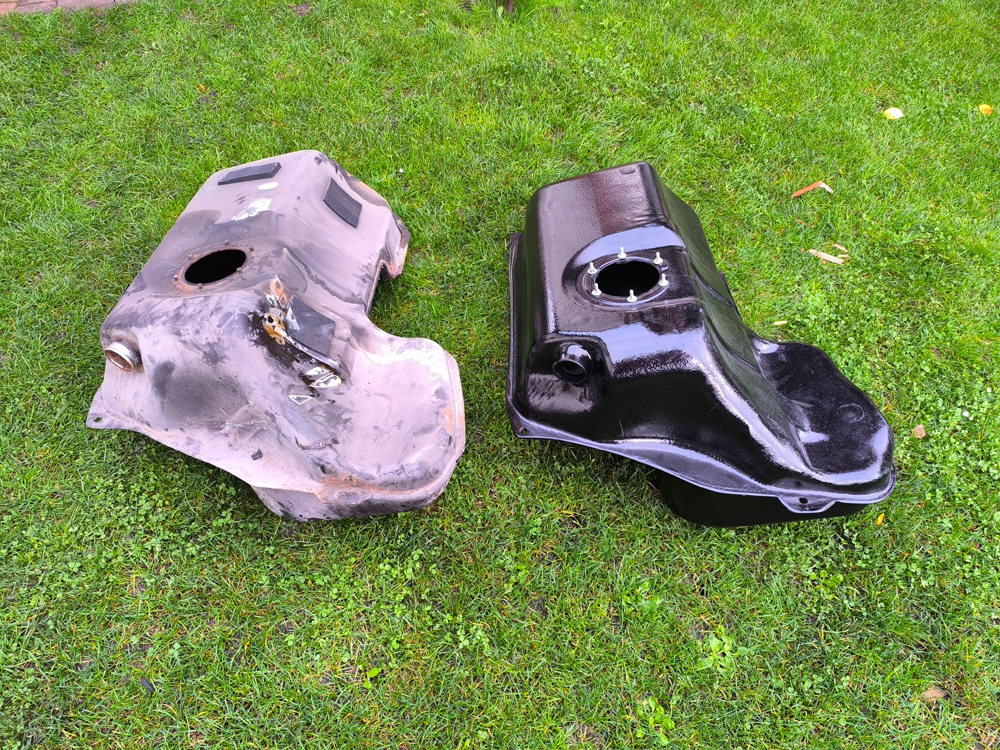
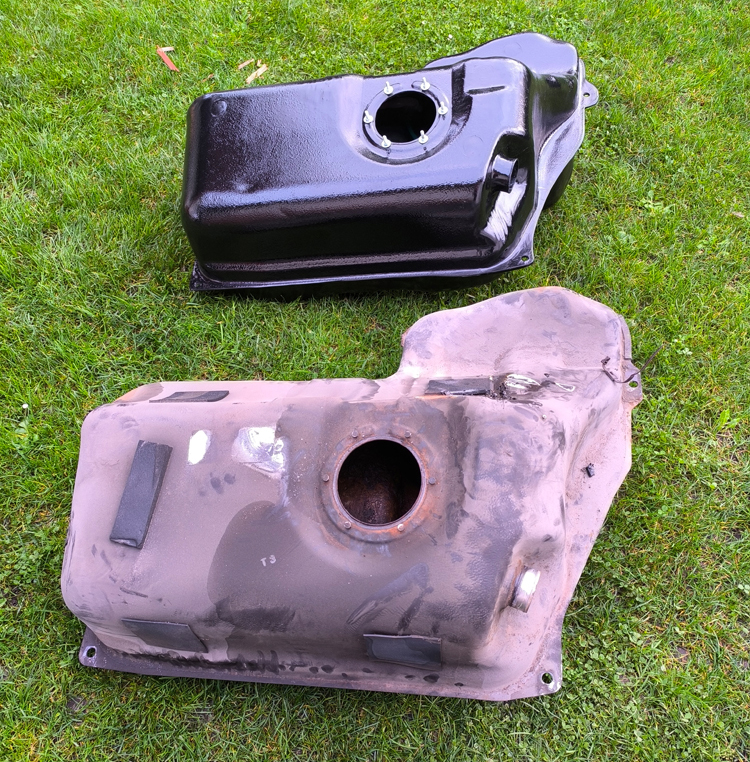
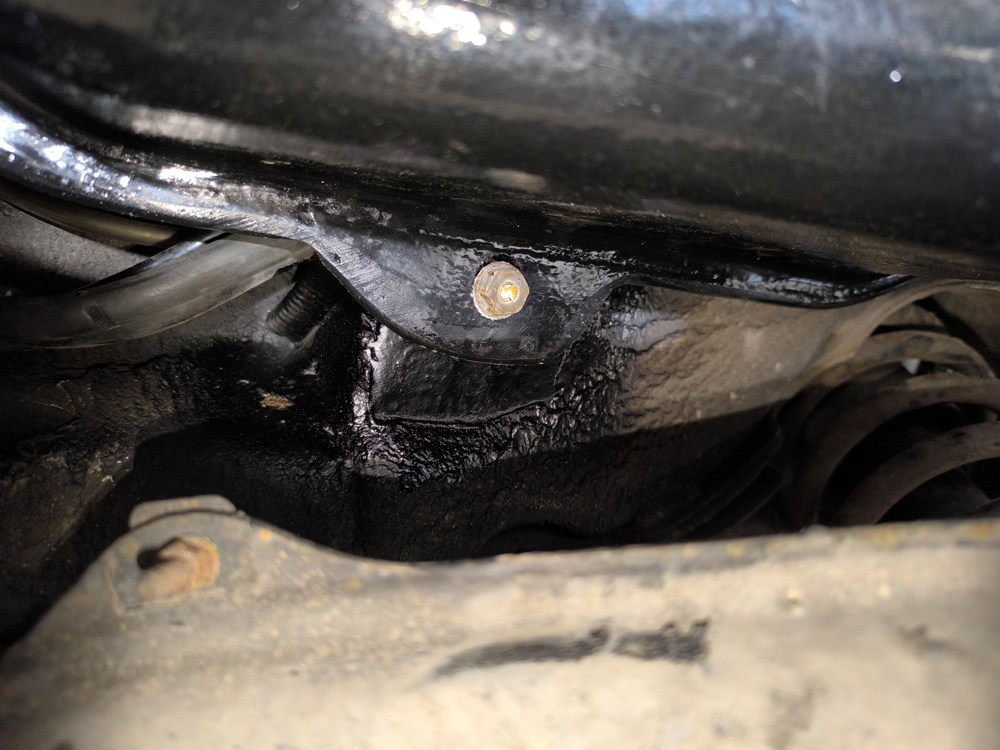
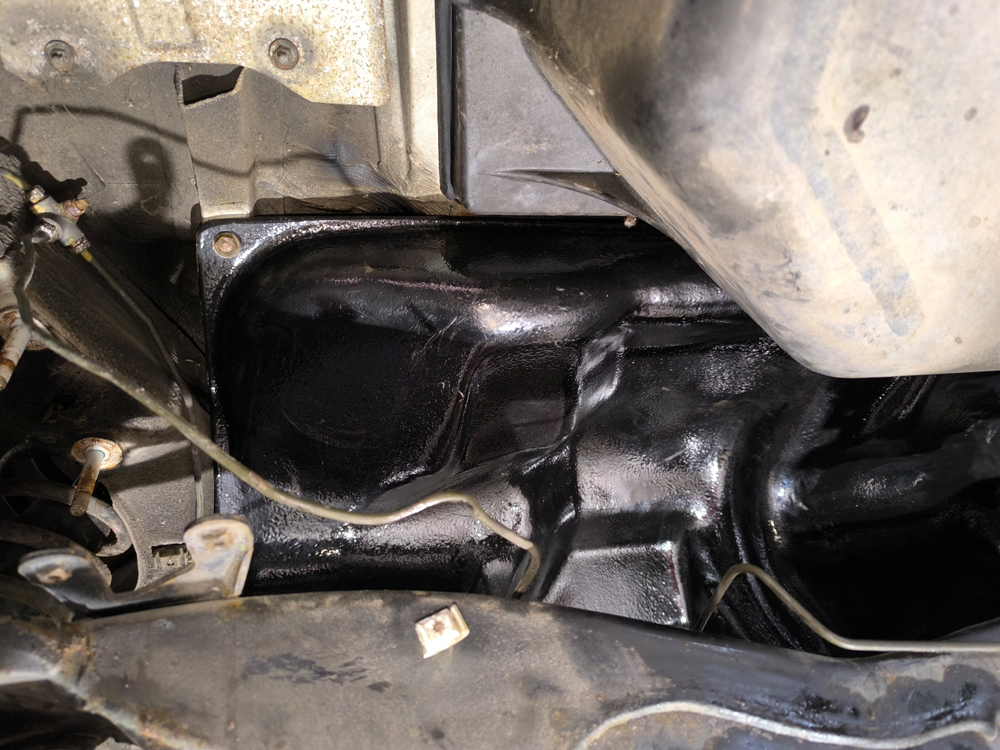
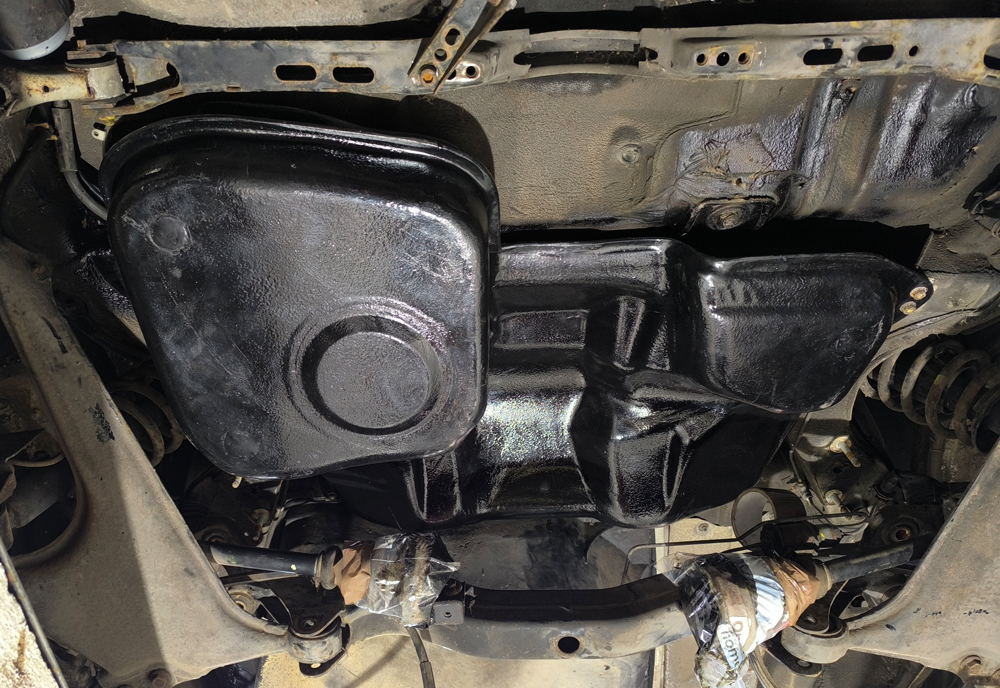
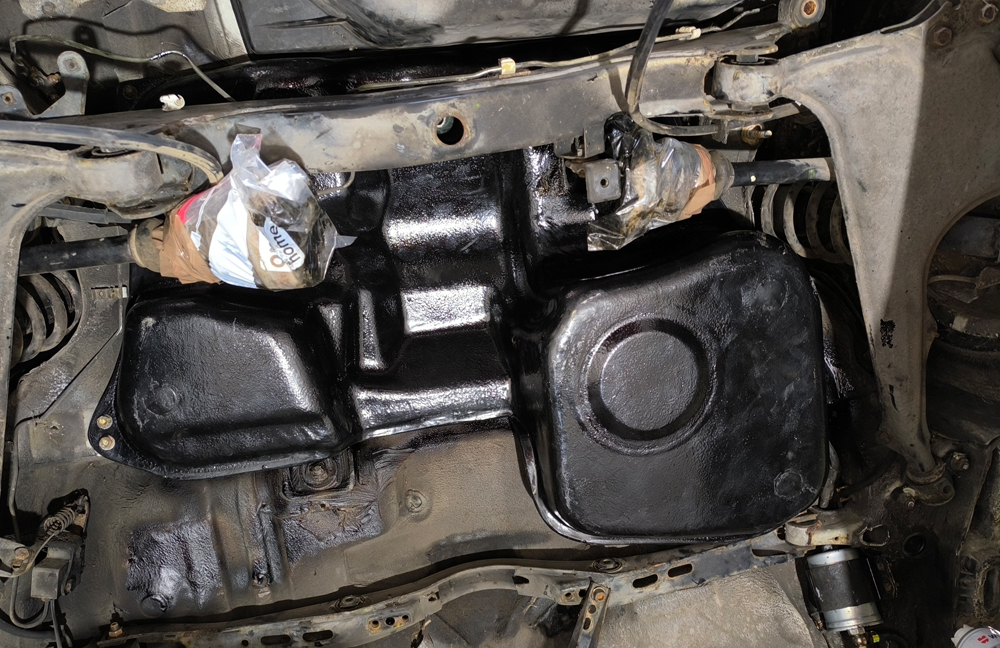
Some comparison and installation photos of the plastic fuel tank – Audi 4X4 – 100 C3 quattro S6 S4 C4 200 V8 – Petrol/Diesel (1982-1998)


The fuel tanks are manufactured in Latvia in full compliance with the technical regulations and standards of the European Union.
Questions about this tank? Write to us in the WhatsApp chat.
💡 Response time: 24/7 chatbot support for product and order inquiries. Response within seconds