...

Plastic Fuel Tank for Mercedes-Benz G-Class Petrol 1975–2001

PL20264

599.00

TÜV Notice
Direct replacement for the original fuel tank.
In most cases, no separate TÜV approval or registration is required.
Shipping within Europe
Delivery time: 4–7 business days
Shipping & prices
Brand

Mercedes-Benz G-Class

Condition

New

Originality

Analogue

Guarantee

3 years

Made in

European Union

In stock

Insured delivery Tank delivery is insured

Manufacturer numbers: A4604710098, A4614700004, A4604700701

Suitable for models: Mercedes-Benz G-Class W460, W461, W462 and Wolf — Petrol

Fuel tank capacity: 70 L

Material: Composite material based on polyester resins, fiberglass and carbon fiber fabric, resistant to petrol and diesel fuel and designed for long service life.

Wall thickness: 5 mm

Weight: 8 kg

Size: 1280 x 630 x 340 mm

Equipment: Tank only

The inside of the fuel tank has hydro-impact baffles made from factory drawings. These internal partitions help reduce fuel movement during driving.

During installation, the fuel tank is secured to the factory mounting points.

Direct deliveries from the manufacturer
Fast insured delivery from Latvia to Germany and other European countries within 4–6 business days via DHL, DPD, UPS, DACHSER or FedEx.

Courier delivery services

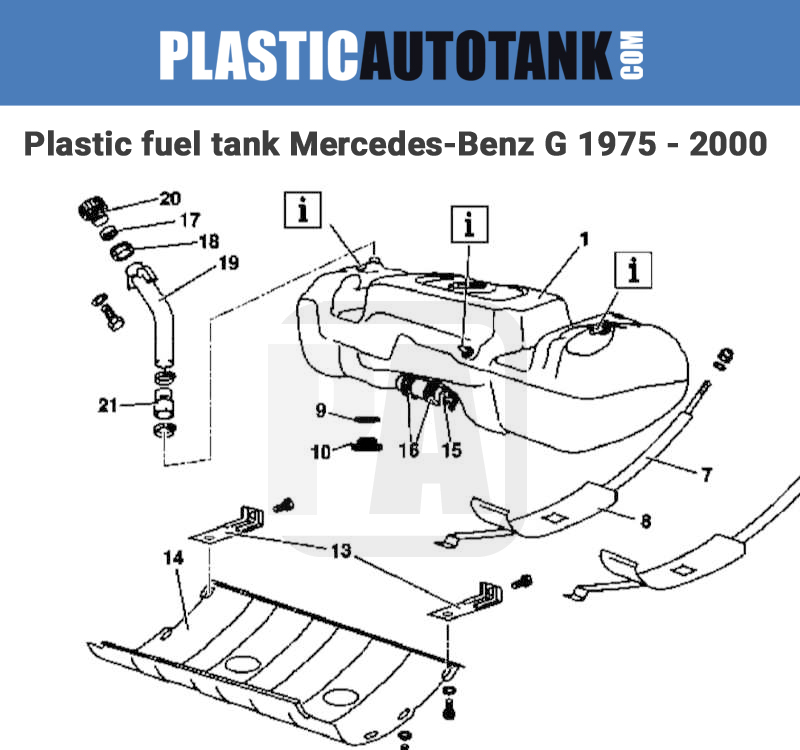
Mercedes-Benz G-Class Petrol Fuel Tank 1975–2001

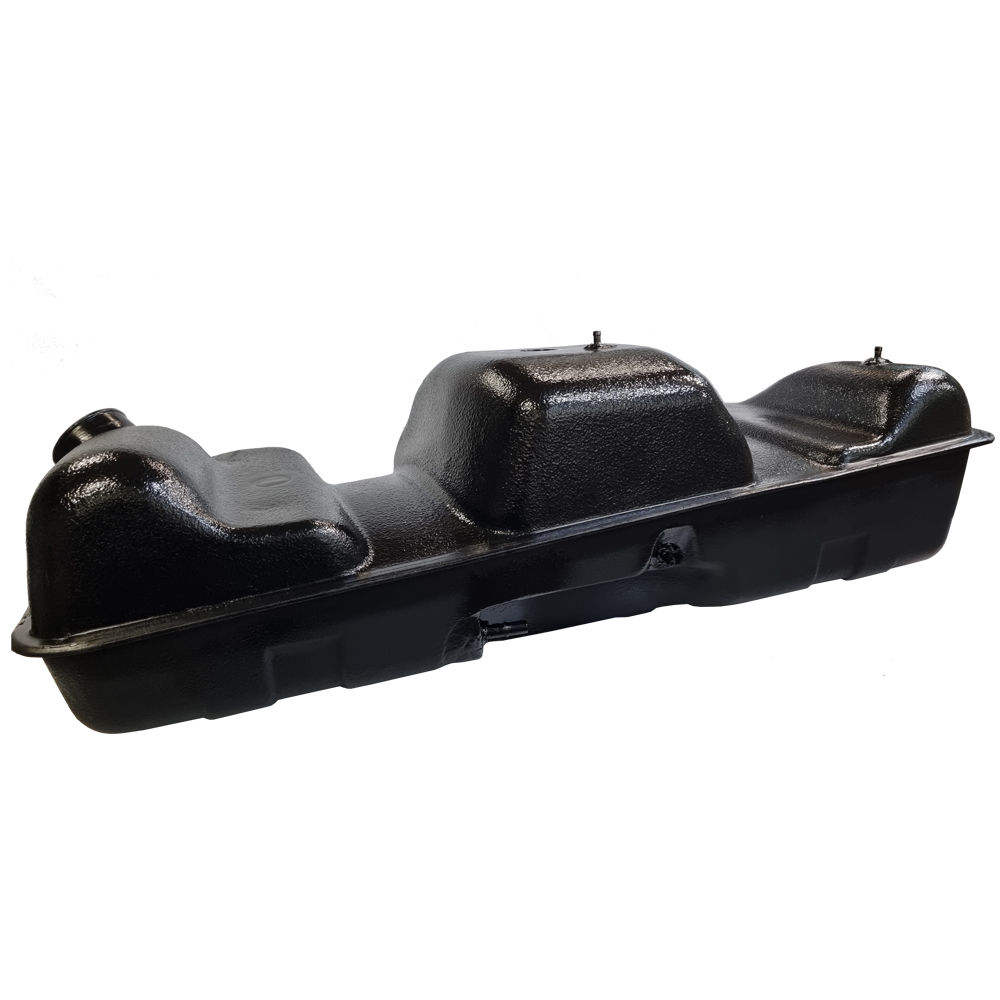
This plastic replacement fuel tank is designed for Mercedes-Benz G-Class petrol models from 1975 to 2001, including W460, W461, W462 and Wolf versions. It is made as a durable replacement for an old, rusted, leaking or damaged original fuel tank.

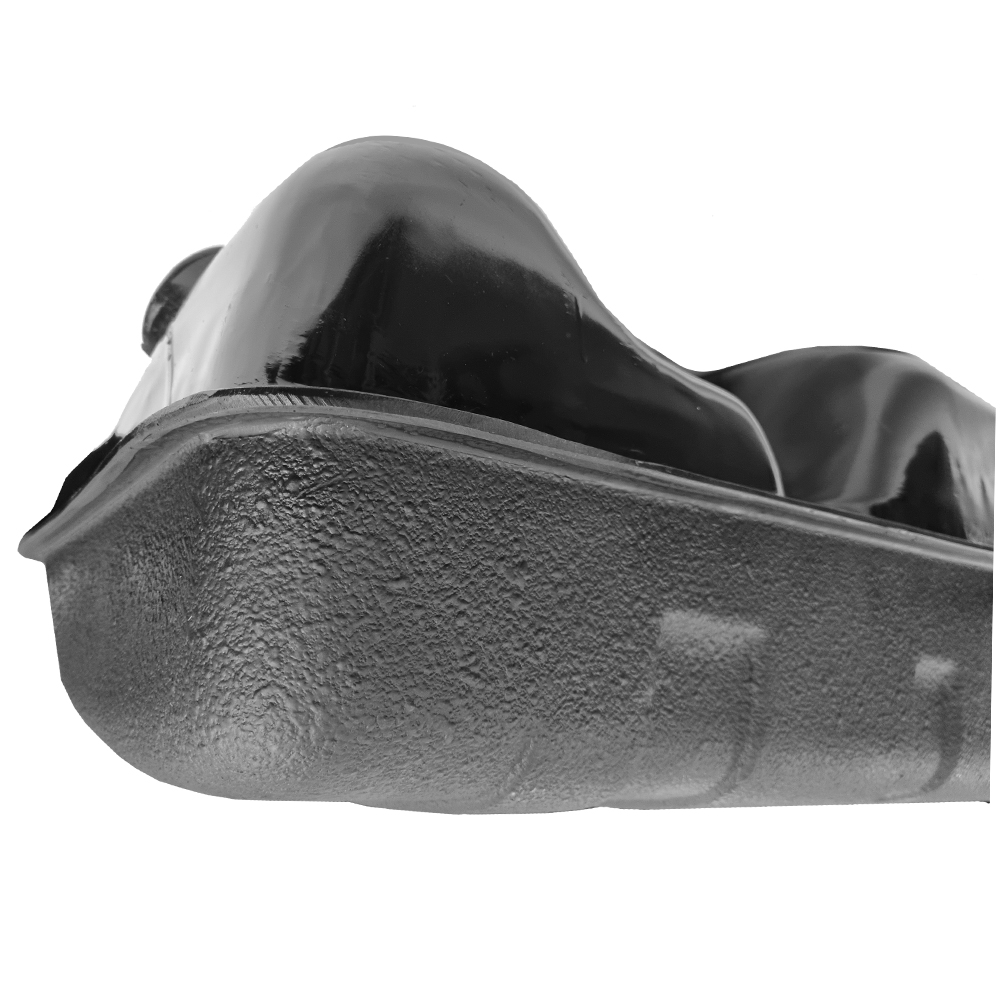
The tank is manufactured in-house in Latvia from a modern composite material based on polyester resins, fiberglass and carbon fabrics. It is resistant to petrol and designed for long service life, with strong impact resistance for off-road and classic G-Class use.

Each fuel tank is pressure-tested after production to help ensure there are no fuel or vapour leaks before shipping.

The fuel tanks are manufactured in Latvia in compliance with applicable European Union technical regulations and quality standards.

  • Vehicle: Mercedes-Benz G-Class
  • Chassis / models: W460, W461, W462, Wolf
  • Production years: 1975–2001
  • Fuel type: Petrol
  • Tank volume: 70 L
  • Material: Composite plastic with fiberglass and carbon fabrics
  • Manufacturing: Made in Latvia, EU
  • Testing: Pressure-tested after production
  • Shipping: Insured delivery available

Mercedes-Benz G-Class petrol fuel tank 1975–2001 W460 W461 W462

Mercedes G-Class fuel tank compatibility

This tank is intended for petrol Mercedes-Benz G-Class vehicles from 1975–2001. It may be suitable for W460, W461, W462 and Wolf versions, depending on the vehicle configuration. If you are unsure about compatibility, send us your vehicle details or VIN before ordering.

Need help checking compatibility?

If you are not sure whether this tank fits your Mercedes-Benz G-Class, send us your vehicle details or VIN in the WhatsApp chat before ordering.

💡 Response time: 24/7 chatbot support for product and order inquiries. Response within seconds
WhatsApp chat for Mercedes-Benz G-Class petrol fuel tank

Mercedes-Benz G-Class (Petrol, 1975–2001) Fuel Tank Replacement Checklist

Safety first: If you’re not comfortable working with fuel systems or heavy lifting, hire a professional.

Safety first

  • Work in a well-ventilated, non-smoking area away from sparks/open flame.

  • Have a fire extinguisher rated for gasoline nearby.

  • Wear safety glasses, nitrile gloves, and have absorbent rags and a fuel catch container.

  • Disconnect the negative battery cable before touching fuel system connectors/electrics.

Parts & consumables (buy before you start)

  • Replacement fuel tank (OEM or aftermarket). Common Mercedes OEM part numbers used in G-Class lineups: 4604701201 / A4604701201 (plastic tank options), and plastic tanks available our website https://plasticautotank.com/

  • Fuel tank installation kit / seals (Mercedes kit for plastic installs A4614700004 / 4614700004 or similar). Replace any O-rings, clamps, sealing rings on the pump/sender.

  • New fuel pump filter sock / pump seal (if applicable), hose clamps, fuel line quick-connect fittings (if aged).

  • Optional: skid plate bolts, new tank strap bolts (many techs replace strap hardware).

Tools you’ll need

  • Metric socket set, ratchet, extensions, Torx bits as required.

  • Line/hose pliers and quick-disconnect tool(s) for fuel lines.

  • Floor jack + wide wood block (to support tank) + heavy duty jack stands or a lift.

  • Torque wrench (for reassembly to spec where available).

  • Fuel siphon pump or approved container to remove most of the fuel (do not spill).

  • Spray penetrating oil (for rusted strap bolts), pry bar, shop light.

  • Fuel-safe drain container, absorbent pads.

Prep (30–60 min)

  1. Park on level ground, chock wheels, and work in ventilated area.

  2. Siphon out as much fuel as practical into an approved container (reduces weight and spill risk). If the tank is nearly empty you’ll have an easier/lighter job.

  3. Remove the negative battery cable.

  4. To relieve fuel system pressure: remove the fuel-pump fuse/relay and then crank the engine until it stalls (this is the common, practical method to drop rail pressure before disconnecting lines). (If unsure, consult the wiring/fuse diagram for your VIN before removing fuses.)

Step-by-step removal (work methodically)

These steps follow Mercedes’ workshop sequence (remove filler/arch access, disconnect lines, remove pump, support tank, lower straps and remove tank).

  1. Raise the vehicle safely on jack stands or use a lift so you have full access under the rear. Block and support securely.

  2. Remove left & right rear wheel-arch protection panels / inner liners to access filler branch and vent lines (Mercedes manual instructs this).

  3. Remove filler cap and disconnect the filler neck branch where it joins the tank (loosen clamps and separate pipes). Cap or plug openings to avoid contamination.

  4. Label and photograph every connector / hose you remove — it makes reassembly far easier.

  5. Disconnect vent hoses (left & right), fuel return line, and any vapor/evap lines. Plug the open ports to keep dirt out.

  6. Disconnect electrical connectors to the fuel pump/sender and any wiring harnesses that pass nearby.

  7. Remove the in-tank fuel pump/sender assembly (if the design requires pump removal before dropping the tank). On many G-models you remove the pump first to clear the top opening. Keep new sealing ring ready for reinstallation.

  8. Support the tank from below with a floor jack and block of wood (center the padding to avoid denting the tank). Loosen the tank strap bolts a few turns first to confirm they’ll turn — apply penetrating oil if seized. On some models you must remove or loosen an underbody skid plate before the straps.

  9. Carefully lower the tank a few inches on the jack, check for any remaining connected hoses/wires, then finish dropping the tank. Keep a catch pan ready for small drips. Many DIY guides & videos show lowering the tank slowly and rotating it to clear the body/frame.

  10. Remove the tank from under the vehicle and transfer the fuel pump/sender and any fittings to the new tank (use new O-rings/seals). Inspect the pump sock for debris — replace if contaminated.

Install the new tank

  1. Fit the fuel pump/sender into the new tank with a new sealing ring; torque the sender/locknut to manufacturer spec if available (replace the rubber seal). If the pump mounts with screws/clamps, tighten securely.

  2. Raise the tank into position on your jack, align it and start the strap bolts by hand. Don’t fully tighten until all straps and protective plates are hand-started.

  3. Reconnect all lines (vent, filler neck, return) and electrical connectors, ensuring seals & clamps are correctly seated and vent hoses routed exactly as original.

  4. Reinstall any skid plate or cross braces and torque to manufacturer or aftermarket instructions (skid plate instructions typically call out M10/M8 torque values; if you’re installing an aftermarket skid, follow its torque spec).

  5. Tighten tank strap bolts to factory torque (consult your workshop manual; if you don’t have access, replace hardware and torque to typical M10 bolt practice — better to consult the exact spec for your VIN). If you can’t find a spec, note that strap bolts are structural and should be tightened firmly and checked after first drive.

Refill, bleed & test

  1. Reconnect battery negative cable.

  2. Add a small amount of fuel (a few liters) — just enough to prime the pump and check for leaks.

  3. Reinstall fuel-pump fuse/relay, then turn ignition ON (do not start) for several seconds to let the pump prime; check for leaks around the pump/sender, hose connections and filler neck. Repeat cycle 2–3 times.

  4. Start the engine and watch for leaks; check fuel gauge sender operation.

  5. With the vehicle on the ground, road-test at low speed, then re-check strap bolts and connections. Check again after 50–100 km.

Common gotchas & tips

  • Many G wagons have a protective skid plate or cross braces that must be removed first — don’t be surprised if the bumper or support pieces are in the way; remove as needed.

  • Replace all sealing rings on the pump/sender; those rubber parts harden with age and are cheap insurance against leaks.

  • Corroded strap bolts are common on older trucks — be ready to cut & replace hardware or use penetrating oil and heat carefully.

  • If you’re swapping metal for plastic tanks (many owners upgrade), you often need an installation kit & updated venting/filler pieces — get the compatible kit for your chassis.

When to call a pro

  • If straps or mounting points are badly corroded or altered, or if the filler neck is seized — welding or frame repairs are sometimes needed.

  • If you cannot safely support the vehicle or tank (no lift/jack stands), let a workshop handle it.

  • Fuel system issues that persist after a tank swap (e.g., low pressure, stalling) — get a pressure test and diagnostic.