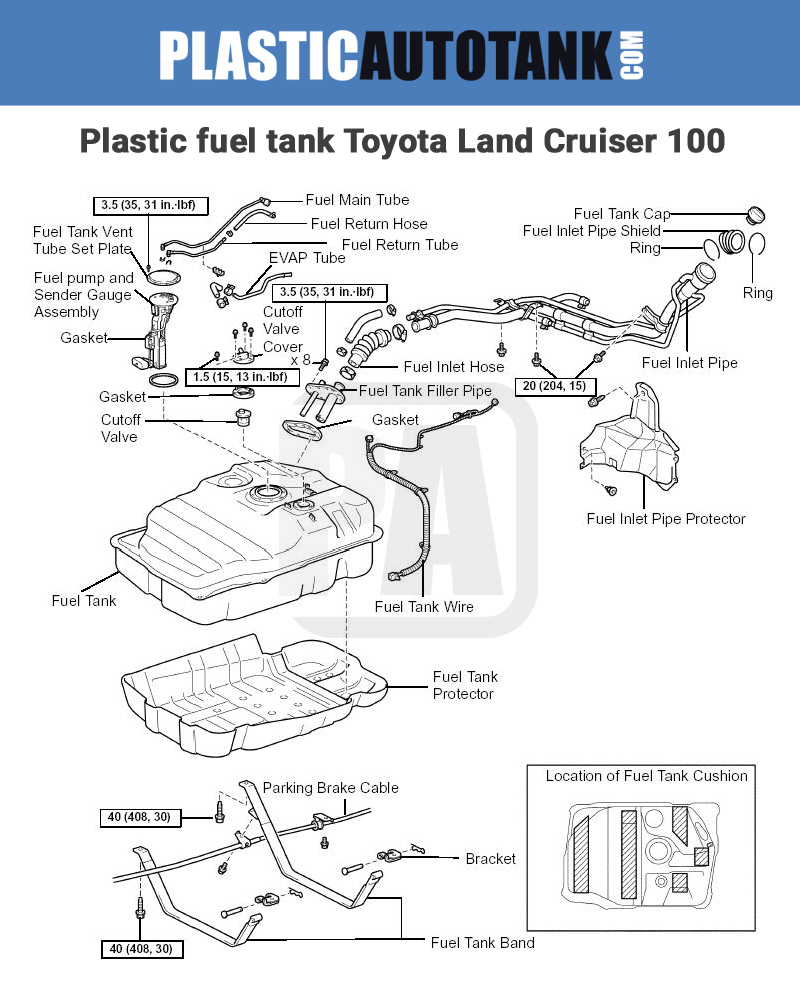

Plastic Fuel Tank for Toyota Land Cruiser 100 / LC100 1997–2008
Replacement fuel tank for Toyota Land Cruiser 100, LC100 and Lexus LX470 petrol/diesel models.
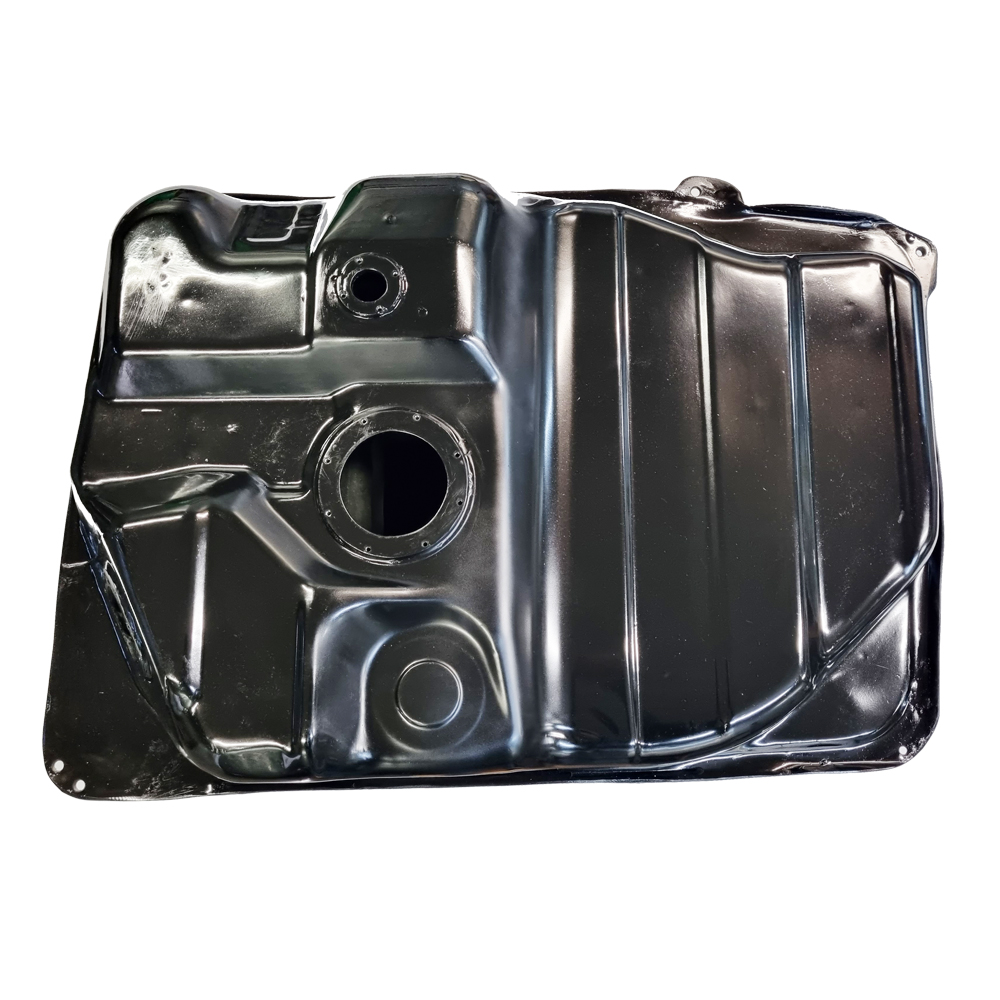
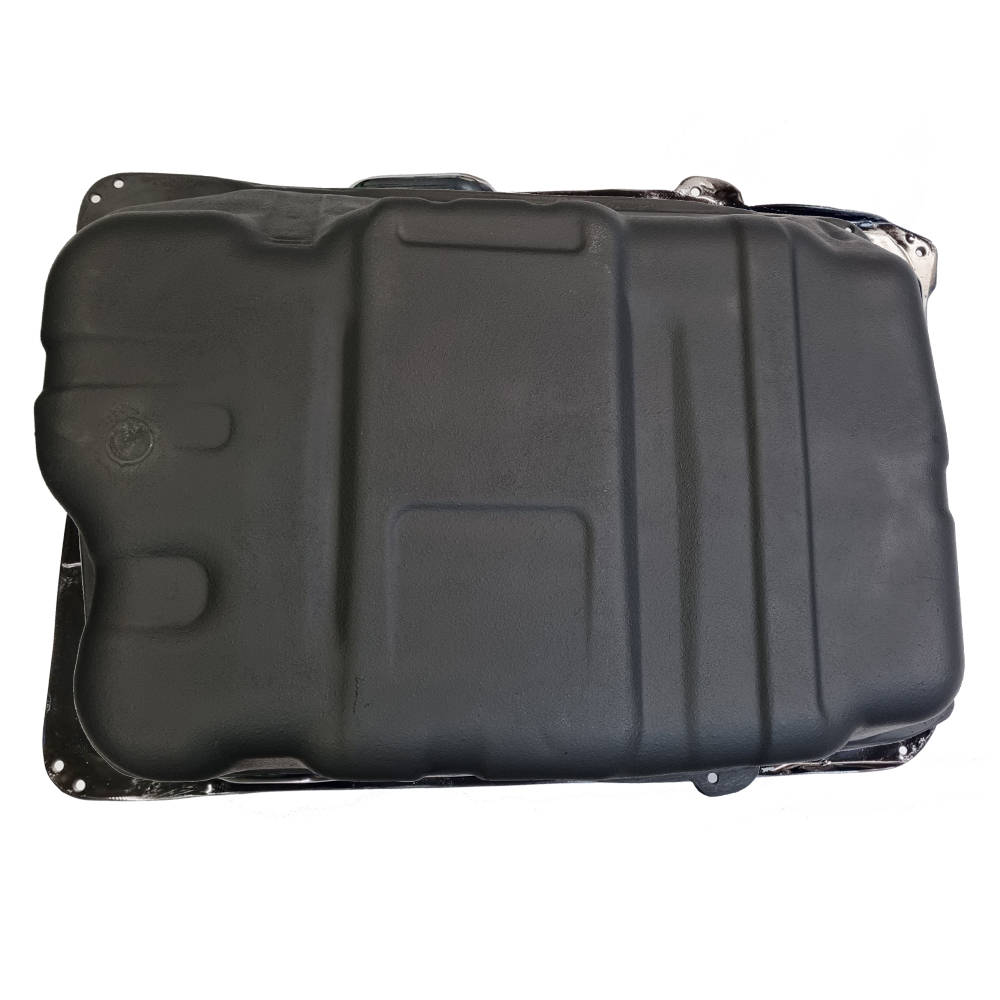
This plastic replacement fuel tank is designed for Toyota Land Cruiser 100 / LC100 models produced from 1997 to 2008. It is also suitable for Lexus LX470 models based on the same J100 platform. The tank is a practical replacement for an old, rusted, leaking, or damaged original steel fuel tank.
The fuel tank is manufactured in-house in Latvia from a modern composite material based on polyester resins, fiberglass and carbon fabrics. This material is resistant to petrol and diesel fuel and does not corrode like a traditional metal tank.
Each fuel tank is pressure-tested after production to help ensure there are no fuel or vapour leaks before shipping.
Compatibility
- Vehicle: Toyota Land Cruiser 100 / LC100
- Also suitable for: Lexus LX470
- Platform: J100
- Production years: 1997–2008
- Fuel type: Petrol / Diesel
- Fuel tank capacity: 96 L

Why choose this replacement fuel tank?
- Corrosion-free alternative: composite plastic does not rust like the original steel tank.
- Direct replacement: designed to fit the original factory mounting points.
- Suitable for petrol and diesel: material is resistant to both petrol and diesel fuel.
- Pressure-tested: every tank is tested after production for fuel and vapour tightness.
- Made in the EU: manufactured in Latvia in compliance with applicable European technical standards.
- 3-year guarantee: supplied with manufacturer warranty against material and production defects.
Need help checking compatibility?
If you are not sure whether this tank fits your Toyota Land Cruiser 100, LC100 or Lexus LX470, send us your vehicle details or VIN in the WhatsApp chat before ordering.
💡 Response time: 24/7 chatbot support for product and order inquiries. Response within seconds